
A manual brake bleeder is a tool used to remove air bubbles from brake systems‚ ensuring optimal braking performance and safety․ This guide provides a comprehensive overview of its use‚ importance‚ and benefits․
What is a Manual Brake Bleeder?
A manual brake bleeder is a tool used to remove air from brake systems by opening bleeder screws with a wrench‚ ensuring proper brake fluid flow․
2․1․ Definition
A manual brake bleeder is a tool designed to remove air bubbles from hydraulic brake systems․ It typically includes a wrench for opening bleeder screws and a container to collect old brake fluid․ The process involves loosening the bleeder screws‚ allowing air and fluid to escape‚ and then tightening them once the system is purged․ This ensures proper brake function and safety․ The tool is essential for maintaining effective braking performance‚ especially after servicing or replacing brake components․ Its simplicity makes it accessible for both professionals and DIY enthusiasts‚ though it often requires an assistant to operate the brake pedal during the bleeding process․
2․2․ Purpose
The primary purpose of a manual brake bleeder is to remove air bubbles from the hydraulic brake system‚ ensuring proper brake function and safety․ Air in the system can cause a spongy brake pedal‚ reduced braking efficiency‚ and increased stopping distances‚ all of which pose significant safety risks․ The manual brake bleeder allows technicians or DIYers to evacuate air pockets and old brake fluid‚ replacing it with fresh fluid․ This process is essential after brake repairs‚ master cylinder replacements‚ or any time the system is opened‚ as air ingress is common․ By restoring a firm pedal feel and consistent braking performance‚ the manual brake bleeder plays a critical role in maintaining vehicle safety and reliability․ Its effectiveness makes it a indispensable tool for both professional mechanics and enthusiasts alike․

Importance of Brake Bleeding
Brake bleeding is crucial for maintaining the integrity and performance of a vehicle’s braking system․ Air bubbles in the brake lines can lead to a spongy pedal‚ reduced braking power‚ and increased stopping distances‚ which are serious safety hazards․ Regular bleeding ensures that the brake fluid flows freely‚ providing consistent and reliable braking․ Over time‚ brake fluid can absorb moisture‚ leading to corrosion and degraded performance․ Bleeding also removes contaminated fluid‚ preventing damage to brake components․ Additionally‚ bleeding is necessary after any brake system modifications or repairs‚ such as replacing brake pads‚ rotors‚ or the master cylinder․ Properly bleeding the brakes restores a firm pedal feel‚ ensuring optimal braking performance and safety on the road․ Neglecting this process can compromise vehicle safety‚ making regular brake bleeding an essential maintenance task․

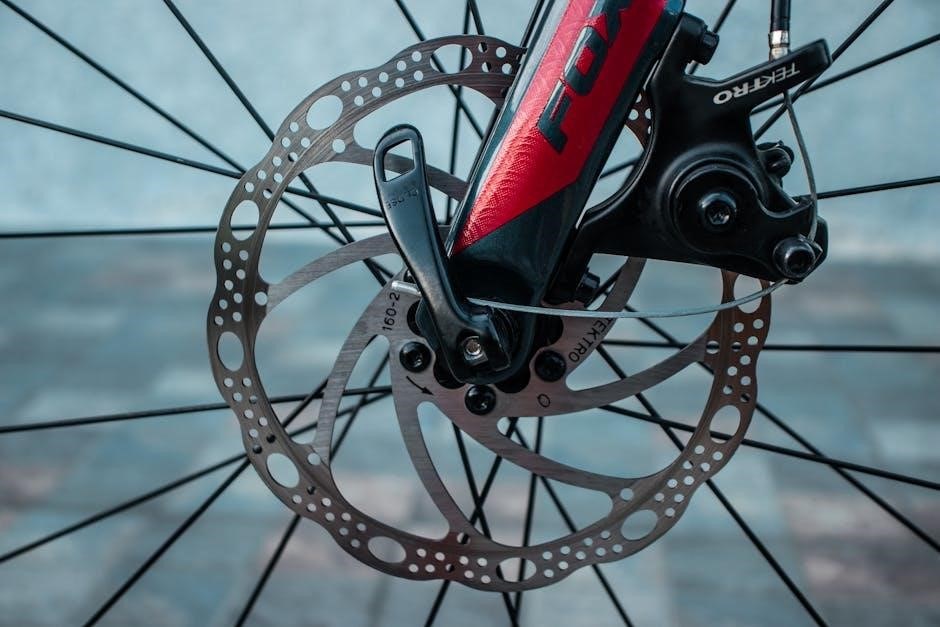
Components of a Manual Brake Bleeder
A manual brake bleeder typically includes a fluid reservoir‚ tubing‚ bleeder valves‚ master cylinder adapter‚ and wrench․ These components work together to remove air bubbles efficiently․
4․1․ Key Components
A manual brake bleeder consists of essential parts designed to facilitate efficient brake fluid bleeding․ The primary components include a fluid reservoir‚ tubing‚ bleeder valves‚ a master cylinder adapter‚ and a wrench․ The reservoir holds the brake fluid‚ while the tubing connects to the bleeder valves located near the brake calipers or wheel cylinders․ The master cylinder adapter ensures a secure connection to the brake system‚ and the wrench is used to open and close the bleeder valves․ These components work together to extract air bubbles from the brake lines‚ ensuring the hydraulic system operates smoothly․ Proper functioning of each part is crucial for successful brake bleeding‚ as any malfunction can lead to incomplete removal of air pockets‚ compromising brake performance and safety․
4․2․ How They Function
The manual brake bleeder operates by creating a vacuum or pressure differential to force brake fluid through the system‚ expelling trapped air․ The process begins with connecting the bleeder to the master cylinder or individual calipers․ Opening the bleeder valve allows fluid to flow into a collection container while air escapes․ The assistant depresses the brake pedal‚ pushing fluid through the lines‚ and the technician closes the valve once fluid appears without bubbles․ This sequence is repeated for each brake line until all air is removed․ The tool ensures that air pockets‚ which can cause spongy pedals and reduced braking efficiency‚ are eliminated‚ restoring the system’s hydraulic integrity and performance․ Proper functioning relies on maintaining consistent fluid flow and careful valve operation to prevent reintroducing air into the lines․
Step-by-Step Guide to Using a Manual Brake Bleeder
Gather tools‚ attach the bleeder‚ open the valve‚ and bleed each brake line․ An assistant depresses the pedal while fluid and air exit the system․
5․1․ Preparing the Vehicle
Begin by gathering essential tools: a box-end wrench‚ brake fluid‚ and a clear container․ Ensure the vehicle is on level ground and apply the parking brake․
Loosen the bleeder screws on each brake caliper with the wrench‚ but do not remove them yet․ Check the brake fluid level in the master cylinder and top it off if necessary․
Position a drip pan or container under the vehicle to catch any spilled fluid․ Have an assistant ready to depress the brake pedal during the bleeding process․
Lastly‚ ensure all wheels are secure and the vehicle is stable․ Double-check that no components are damaged before proceeding with the bleeding process․
5․2․ The Bleeding Process
Start by loosening the bleeder screw on the caliper furthest from the master cylinder using a box-end wrench․ Have your assistant press the brake pedal slowly‚ then hold it firm․ While the pedal is held‚ tighten the bleeder screw to release air bubbles and fluid into the container․ Repeat this process until the fluid flows cleanly without air bubbles․ Move to the next caliper‚ working your way closer to the master cylinder․ After completing all four wheels‚ inspect the brake fluid level in the master cylinder and refill if necessary․ Ensure no air is introduced during the process‚ as this could require starting over․ Finally‚ test the brake pedal to confirm it feels firm and responsive․

Safety Precautions When Using a Manual Brake Bleeder
When using a manual brake bleeder‚ prioritize safety to avoid accidents and ensure proper brake function․ Always wear protective gloves and eyewear to shield yourself from brake fluid splashes․ Ensure the vehicle is securely supported by jack stands and the parking brake is engaged․ Never press the brake pedal rapidly‚ as this can introduce air into the system․ Use the correct box-end wrench size to avoid rounding the bleeder screw․ Keep brake fluid away from painted surfaces‚ as it can cause damage․ Avoid breathing in brake fluid fumes‚ and work in a well-ventilated area․ After bleeding‚ test the brakes in a safe‚ open space before driving․ Properly dispose of used brake fluid and materials․ Failure to follow these precautions can lead to unsafe braking performance or personal injury․
When to Use a Manual Brake Bleeder
A manual brake bleeder is essential in specific situations to ensure proper brake system functionality․ Use it when you notice a spongy brake pedal‚ which often indicates air in the brake lines․ After replacing brake components‚ such as pads‚ rotors‚ or the master cylinder‚ bleeding the brakes is necessary to remove any trapped air․ If the ABS light illuminates on your dashboard‚ it may signal air in the system‚ requiring a bleed․ Additionally‚ after opening the brake system for repairs or fluid changes‚ bleeding is crucial to restore consistent braking performance․ Regular maintenance‚ especially for vehicles exposed to frequent stop-and-go driving‚ also benefits from periodic bleeding․ Promptly addressing these scenarios ensures reliable braking and safety on the road․
Common Challenges and Solutions
When using a manual brake bleeder‚ common challenges include air re-entering the system‚ brake fluid leakage‚ and difficulty in bleeding certain vehicle types․ To prevent air from re-entering‚ ensure the reservoir stays filled and use a one-way valve or vacuum pump․ For leakage‚ tighten connections properly and inspect for worn components․ If bleeding is slow‚ check for blockages in hoses or calipers․ Some vehicles‚ especially those with ABS systems‚ may require specialized procedures or tools․ In such cases‚ consult the vehicle’s manual or use a pressure bleeder for efficiency․ Always maintain a steady pedal press and avoid rapid movements to prevent introducing air․ Proper preparation and patience are key to overcoming these challenges and ensuring a successful brake bleeding process․
Manual vs․ Pressure Brake Bleeders
Manual and pressure brake bleeders differ in functionality and convenience․ Manual bleeders require an assistant to press the brake pedal while you open and close bleeder screws‚ making the process time-consuming but cost-effective․ Pressure bleeders‚ on the other hand‚ use a pump to force brake fluid through the system‚ allowing one-person operation and reducing the risk of introducing air․ Manual systems are ideal for DIYers and basic vehicles‚ while pressure systems are preferred for professionals and complex braking systems․ Both methods ensure air removal‚ but pressure systems are faster and more efficient‚ especially for modern vehicles with ABS․ Choose based on your skill level‚ budget‚ and vehicle requirements․
Utilizing a manual brake bleeder is a practical approach to maintaining your vehicle’s braking system․ By following the outlined steps and safety precautions‚ you can effectively remove air bubbles and ensure optimal brake performance․ Regular brake bleeding is crucial for safety‚ and a manual bleeder offers a cost-effective solution for DIY enthusiasts․ While pressure bleeders may offer convenience‚ manual systems remain reliable for most applications․ Always refer to your vehicle’s manual for specific instructions and consider upgrading to tools like Speedbleeders for easier future maintenance․ Proper brake function is vital‚ so take the time to master this process for safer driving․ Remember‚ patience and attention to detail are key to successful brake bleeding․
Additional Resources
For further learning and troubleshooting‚ consider exploring the following resources:
- Speedbleeders: A popular upgrade for easier one-person bleeding․
- Motive Black Label and Schwaben: High-quality pressure bleeders for efficient brake maintenance․
- Sealey Pressure Auto-Fill Bleeder: A professional-grade tool for precise brake fluid management․
- Online Forums: Communities like Reddit’s r/DIY and specialized automotive forums offer valuable tips and experiences․
- YouTube Tutorials: Detailed videos demonstrate manual and pressure bleeding techniques․
- Manufacturer Guides: Consult your vehicle’s manual or OEM repair guides for specific instructions․
These resources provide comprehensive support for mastering brake bleeding and troubleshooting common issues․

Final Tips for Effective Brake Bleeding
To ensure a successful brake bleeding process‚ follow these key tips:
- Use the right tools: Invest in a quality brake bleeder kit or tools like Speedbleeders for easier one-person operation․
- Work methodically: Start bleeding from the caliper farthest from the master cylinder and move inward to avoid reintroducing air․
- Check for leaks: After bleeding‚ inspect all connections to ensure no brake fluid is escaping․
- Maintain fluid level: Always keep the master cylinder reservoir filled during the process to prevent air from entering․
- Use a vacuum pump: This can simplify the process and reduce the risk of air bubbles forming․
- Test the brakes: After bleeding‚ test the vehicle’s brakes to ensure a firm pedal and proper function․
By following these tips‚ you can achieve a safe and effective brake bleeding process‚ ensuring optimal braking performance․