
The Euro Pro Sewing Machine is a versatile, powerful tool for sewing enthusiasts. Ideal for various fabrics and projects, it offers advanced features, durability, and ease of use. This manual provides a comprehensive guide to unlocking its full potential, ensuring optimal performance and creativity.
1.1 Overview of the Euro Pro Sewing Machine
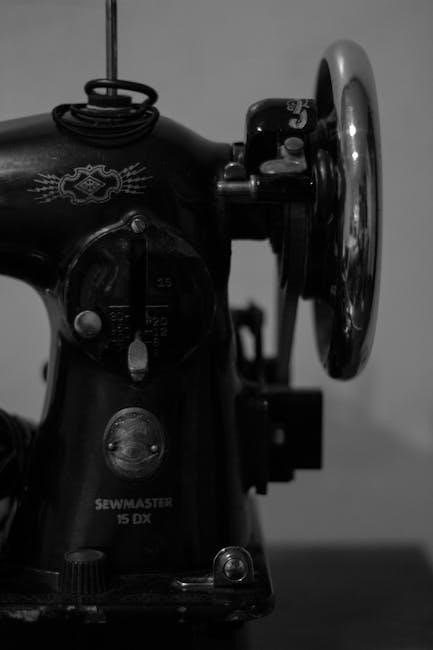
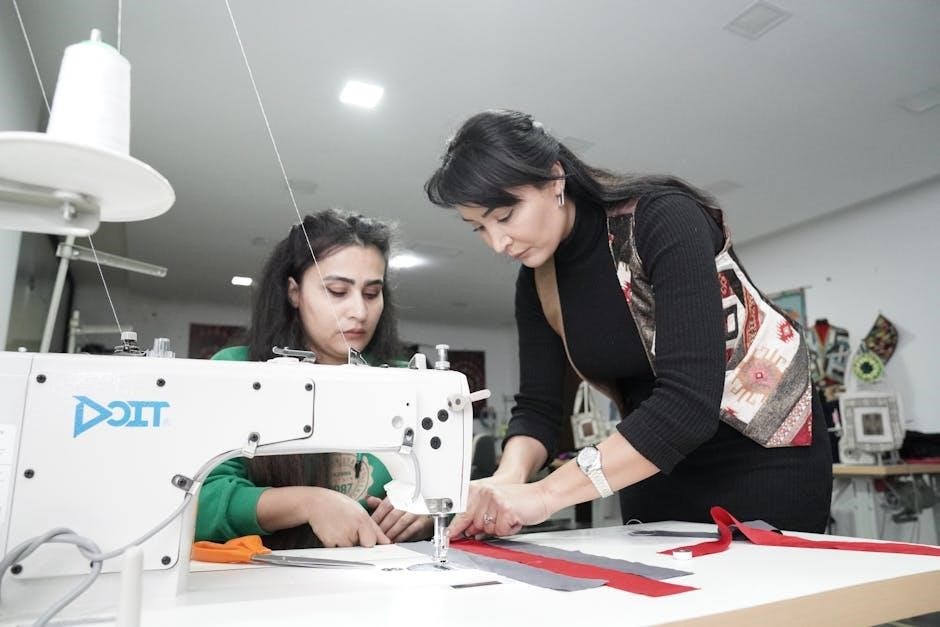
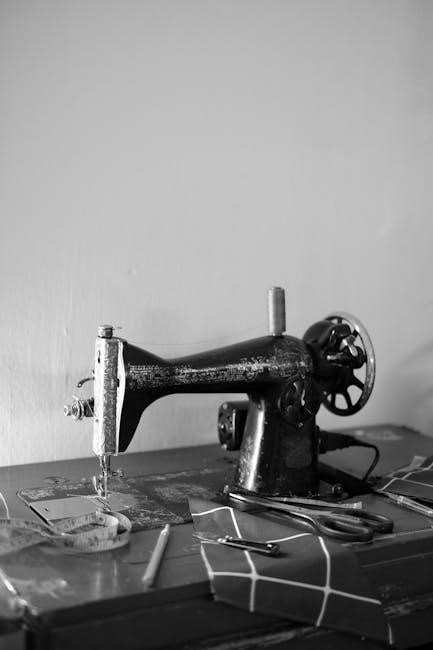
The Euro Pro Sewing Machine is a versatile and reliable appliance designed for both beginners and experienced sewists. Known for its durability and ease of use, it offers a range of features to tackle various sewing projects, from delicate fabrics to heavy-duty materials. Models like the Euro Pro 372/373/374/377 and 7100/7500 are popular for their advanced stitching options, including straight stitch, zigzag, and overlock capabilities. The machine is also equipped with accessories like presser feet and a knee lift, enhancing functionality. This overview provides a foundation for understanding the machine’s capabilities and preparing users for optimal operation.
1.2 Importance of the Instruction Manual
The instruction manual is essential for understanding and optimizing the Euro Pro Sewing Machine’s features. It provides detailed guidance on setup, operation, and maintenance, ensuring safe and effective use. The manual covers threading, bobbin installation, and troubleshooting, helping users overcome common challenges. Additionally, it outlines warranty terms and customer support options, offering peace of mind. By following the manual, users can maximize the machine’s potential, explore advanced features, and maintain its performance over time. Regularly referring to the manual ensures a smooth sewing experience and helps users achieve professional-quality results.
Safety Precautions
Always follow safety guidelines to avoid accidents. Keep children away, use the machine correctly, and avoid loose clothing. Ensure proper ventilation and handle sharp parts with care.
2.1 General Safety Guidelines
Always prioritize safety when operating the Euro Pro Sewing Machine. Ensure the machine is placed on a stable, flat surface and kept away from water. Avoid wearing loose clothing or jewelry that could get caught. Keep children and pets away while sewing. Use the machine only for its intended purpose and follow the instructions carefully. Never touch moving parts with your hands or fingers. Ensure proper ventilation and avoid sewing near flammable materials. If unsure about any operation, refer to the manual or contact customer support for assistance. Regular maintenance is essential for safe and efficient performance.
2.2 Handling the Machine Safely
Handle the Euro Pro Sewing Machine with care to ensure safety and longevity. Always use both hands to lift or move the machine, avoiding sudden jerks or drops. Keep fingers away from the needle and other moving parts during operation. Never touch the machine’s hot surfaces, such as the motor or light bulb. Maintain a clean and clutter-free workspace to prevent accidents. When not in use, unplug the machine and store it in a dry, secure location. Regularly inspect for damage and avoid using the machine if any parts are loose or malfunctioning. Proper handling ensures safe and efficient sewing experiences.
Machine Setup and Parts Identification
Begin by carefully unpacking the Euro Pro Sewing Machine and inspecting for damage. Familiarize yourself with essential parts like the needle, bobbin, presser foot, and stitch selectors for smooth operation.
3.1 Unpacking and Initial Inspection
When unpacking your Euro Pro Sewing Machine, carefully remove all components from the box. Inspect the machine for any visible damage or defects. Ensure all accessories, such as the power cord, presser feet, and needles, are included. Examine the stitch selectors, bobbin case, and tension dials to familiarize yourself with their locations and functions. Before use, verify that all parts are intact and properly aligned. This step ensures a smooth setup process and helps prevent future operational issues.
3.2 Identifying Key Components of the Machine
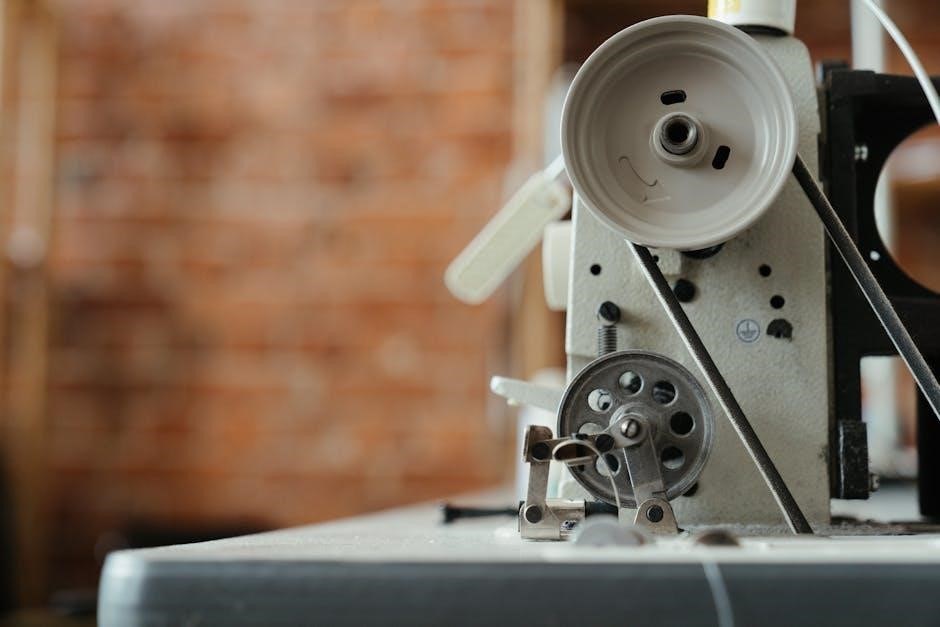
Familiarize yourself with the Euro Pro Sewing Machine’s key components. The spool pins hold the thread, while the stitch selectors and tension dials control stitch type and thread tightness. The bobbin case and presser foot are essential for fabric handling. Locate the power switch, handwheel, and knee lift for operation. Understanding these parts ensures proper setup and use, enhancing your sewing experience and troubleshooting abilities.
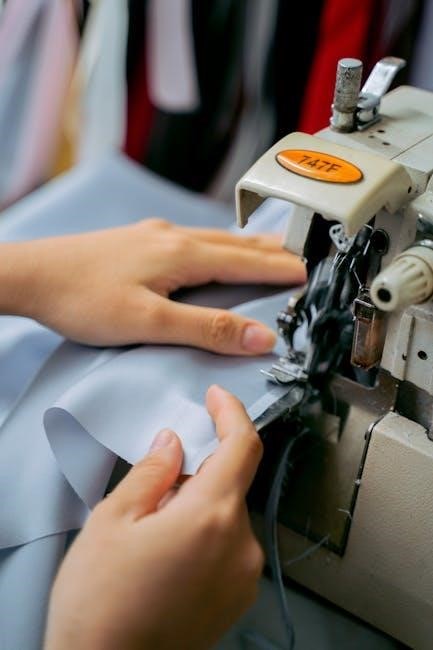
Threading the Machine
Threading the Euro Pro sewing machine involves guiding the thread through the spool pin, tension discs, and take-up lever before inserting it into the needle.
4.1 Step-by-Step Threading Guide
Threading your Euro Pro sewing machine is essential for smooth operation. Start by turning the handwheel to raise the take-up lever. Place the thread on the spool pin and guide it through the tension discs. Pass the thread through the take-up lever, ensuring it sits properly in the groove. Continue threading through the channel and finally insert it into the needle. Adjust the tension dials as needed for balanced stitching. For specific models like the Euro Pro 372/373/374/377 and 7100/7500, refer to the manual for precise threading diagrams and instructions. Proper threading ensures consistent stitch quality and prevents common issues like thread breakage or uneven tension.
4.2 Adjusting Thread Tension
Adjusting thread tension is crucial for achieving perfect stitches. Start by threading the machine correctly, then test the tension by sewing a straight line on scrap fabric. If the stitches are uneven or puckered, tweak the tension dials. Loosen the upper thread tension for less resistance and tighten for more. For the bobbin thread, adjust the small screw on the bobbin case. Ensure balanced tension to avoid fabric distortion. For models like the Euro Pro 372/373/374/377 and 7100/7500, refer to the manual for specific tension settings. Proper adjustment ensures smooth sewing and prevents thread breakage or uneven stitching.
Bobbin and Needle Setup
Properly winding and installing the bobbin ensures smooth stitching. Insert the bobbin into the case, aligning it correctly. Install the needle with the flat side facing the correct direction. Always use compatible parts for optimal performance.
5.1 Winding and Installing the Bobbin
To wind the bobbin, place it on the winder and secure it. Use the correct thread type for your fabric. Wind the thread evenly, not overfilling the bobbin. Cut the excess thread and insert the bobbin into the machine’s bobbin case. Ensure it is properly seated and aligned. Gently pull the thread to confirm it is not tangled. Adjust the bobbin tension if necessary, following the manual’s guidelines. Properly wound and installed bobbins ensure smooth stitching and prevent thread breakage during sewing. Always refer to the manual for model-specific instructions.
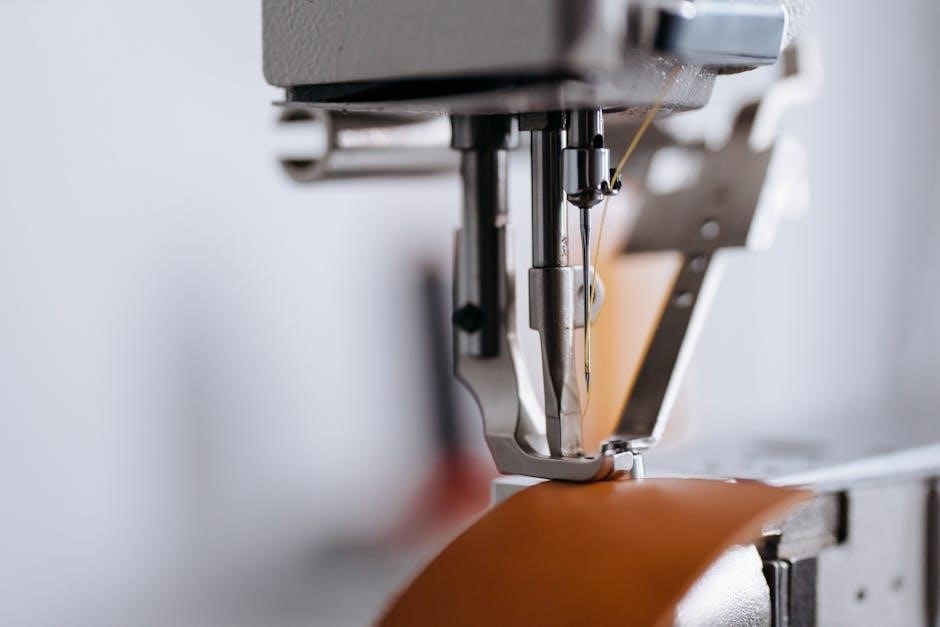
5.2 Correct Needle Installation and Alignment
To install the needle correctly, first, remove any old needle by pulling it straight out. Insert the new needle into the needle bar, ensuring the flat side aligns with the machine’s specified orientation. Secure it firmly with the needle clamp screw. Verify the needle is straight and properly seated. Use the correct needle type for your fabric to avoid damage or poor stitching. Misaligned needles can cause thread breakage or uneven stitching. Always refer to your Euro Pro manual for model-specific instructions and compatibility. Proper needle installation ensures smooth operation and optimal sewing results.
Basic Sewing Operations
Master the basics of sewing with your Euro Pro machine. Learn to start, sew forward and backward, and adjust stitches for perfect results. Maintain consistent tension and use appropriate techniques for smooth operation.
6.1 Starting Your First Stitch
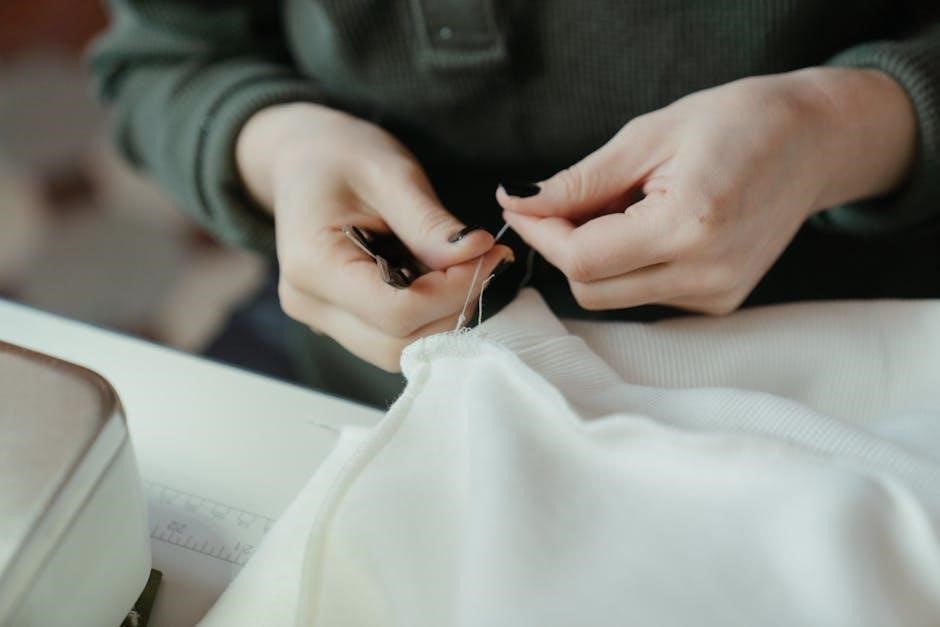
Starting your first stitch with the Euro Pro Sewing Machine involves proper preparation. Ensure the machine is threaded correctly, the bobbin is installed, and tension settings are balanced. Place your fabric under the presser foot, aligning the edge with the machine’s guide; Lower the presser foot securely and start sewing at a slow, steady pace. Use the handwheel to guide the fabric smoothly. Always ensure the machine is well-oiled and maintained for optimal performance. If issues arise, consult the manual for troubleshooting tips to ensure your first stitch is perfect and frustration-free.
6.2 Sewing Forward and Backward
To sew forward, select your desired stitch pattern using the stitch selector. Gently press the foot pedal to start sewing, guiding the fabric smoothly. For backward stitching, use the reverse stitch button to secure seams. This feature is ideal for reinforcing fabric edges. Always maintain even thread tension and use the handwheel to control fabric movement. Ensure proper fabric handling to achieve straight, consistent stitches. If sewing thick materials, consider using the knee lift for the presser foot to keep hands free. This enhances control and precision while sewing forward or backward.
6.3 Adjusting Stitch Length and Width
Adjust the stitch length and width using the control dials located on the front of the machine. Turn the stitch length dial to increase or decrease the length, while the stitch width dial controls the zigzag or decorative stitch width. For straight stitches, set the width to zero. Use the built-in guide to ensure proper alignment. Always test adjustments on scrap fabric before sewing your final project. This feature allows for precise customization, ensuring professional-looking results for various fabrics and sewing tasks. Proper adjustment enhances stitch quality and fabric handling.
Advanced Sewing Features
The Euro Pro Sewing Machine offers advanced features like the knee lift for hands-free operation and a long arm version for larger projects, enhancing sewing efficiency and creativity.
7.1 Using the Knee Lift for Sewing Foot
The knee lift for the sewing foot on the Euro Pro Sewing Machine allows for hands-free operation, providing increased control and flexibility. To use it, first ensure the machine is set to the desired stitch type. Gently press the knee lift with your knee to raise the foot, keeping your hands free to maneuver fabric. This feature is particularly useful for quilting, large projects, or when additional workspace is needed. Always lower the foot gently to avoid sudden movements that could damage the machine or fabric. Proper use enhances sewing efficiency and precision.
7.2 Sewing with the Long Arm Version
The long arm version of the Euro Pro Sewing Machine offers extended workspace, making it ideal for large-scale projects like quilting, home decor, or heavy-duty fabrics. To use this feature, ensure the machine is properly assembled and the long arm attachment is securely fitted. Thread the machine as instructed and select the appropriate stitch type. When sewing, guide the fabric smoothly under the needle, utilizing the extra space for better control. This feature enhances productivity and ease of use for complex or oversized materials, ensuring professional-grade results with minimal effort.
Maintenance and Troubleshooting
Regularly clean and oil the machine to ensure smooth operation. Address common issues like thread jams or tension problems promptly. Always use genuine Euro Pro parts.
8.1 Cleaning and Oiling the Machine
Regular cleaning and oiling are essential to maintain your Euro Pro Sewing Machine’s performance. Turn off and unplug the machine before starting. Use a soft brush to remove lint and debris from the bobbin area, feed dogs, and stitch plate. Apply a few drops of sewing machine oil to the hook race and other moving parts as indicated in the manual. Avoid over-oiling, as it can attract dust and cause issues. Clean and oil after every use to ensure smooth operation and extend the machine’s lifespan. Refer to the manual for specific guidance on lubrication points and frequency.
8.2 Common Issues and Solutions
Common issues with the Euro Pro Sewing Machine include thread tension problems, fabric jamming, and bobbin issues. If thread tension is uneven, adjust the dials as instructed in the manual; For fabric jams, stop sewing immediately, turn off the machine, and gently remove the fabric. Bobbin problems, such as improper winding, can cause stitching errors. Ensure the bobbin is correctly seated and wound. Regular cleaning and oiling can prevent many issues. If problems persist, refer to the troubleshooting section in the manual or contact Euro Pro customer support for assistance. Always follow the manual’s guidelines for resolving specific concerns.
Accessories and Additional Features
The Euro Pro Sewing Machine offers various accessories, including compatible presser feet and optional attachments, to enhance functionality and versatility for different sewing tasks and projects.
9.1 Compatible Presser Feet and Accessories
The Euro Pro Sewing Machine supports a variety of compatible presser feet, such as the knee lift for hands-free sewing foot control, enhancing convenience and precision. Additional accessories include specialized feet for zippers, buttonholes, and quilting, catering to diverse sewing needs. These attachments are designed to optimize performance for specific tasks, ensuring versatility and efficiency. Compatible with models like the Euro Pro 372, 7100, and 7500, these accessories are tailored to enhance your sewing experience. By utilizing these tools, users can expand their creative possibilities and achieve professional-grade results with ease and accuracy.
9.2 Optional Attachments for Enhanced Functionality
Optional attachments for the Euro Pro Sewing Machine include a long arm version, ideal for quilting and large projects, providing extended workspace. The machine also supports an overlock stitch option by removing the left needle, enabling professional seam finishes. Additionally, a free-arm attachment is available, perfect for sewing cuffs and sleeves. These attachments enhance versatility and precision, allowing users to tackle a wider range of projects with ease. Compatibility varies by model, with the long arm feature being particularly popular for the Euro Pro 7100 and 7500 models;
Warranty and Customer Support
Euro Pro Sewing Machines come with a warranty for household use, provided proper care and maintenance are followed. Customer support is available for inquiries and troubleshooting.
10.1 Understanding the Warranty Terms
Understanding the warranty terms for your Euro Pro Sewing Machine is essential to ensure coverage. The warranty applies to defects in materials and workmanship for a specified period. Coverage is valid only for the original purchaser and when the machine is used for household purposes. Proper maintenance, as outlined in the manual, must be followed to maintain warranty validity. Warranty does not cover damage from misuse, neglect, or unauthorized repairs. Always refer to the official warranty document for detailed terms and conditions.
10.2 Contacting Euro Pro Customer Service
For assistance with your Euro Pro Sewing Machine, contact customer service via phone, email, or through their official website. Visit the Euro Pro website to find the contact details specific to your region. Ensure you have your machine’s model number and a detailed description of your inquiry ready. Representatives are available to address warranty questions, troubleshooting, and general support. Additionally, downloadable resources and FAQs on the website can provide immediate answers to common issues. Reaching out to customer service is the best way to resolve concerns and ensure your machine operates optimally.
Downloading the Manual
Download the Euro Pro Sewing Machine manual from the official website or reputable platforms like ManualsLib. Ensure it matches your specific model for accurate guidance and optimal use.
11.1 Finding the Correct Manual for Your Model
To find the correct manual for your Euro Pro Sewing Machine, visit the official Euro-Pro website or trusted platforms like ManualsLib. Enter your model number, such as Euro Pro 372, 7100, or 7500, to locate the specific guide. Ensure the manual matches your machine’s model to access accurate instructions. Additionally, verify the manual’s language and format, such as PDF, for easy viewing and printing. This step ensures you have the right information to operate and maintain your sewing machine effectively.
11.2 Downloading and Saving the PDF Manual
Once you’ve identified the correct manual for your Euro Pro model, proceed to download the PDF version. Most manuals are available on the Euro-Pro website or platforms like ManualsLib. Click the download link and save the file to your device. Ensure the file is in PDF format for compatibility with most devices. After downloading, consider saving it to a dedicated folder for easy access. Some manuals also include a table of contents for quick navigation. Print the manual if needed, or use digital tools to search for specific topics like troubleshooting or advanced features.
Model-Specific Instructions
Model-specific instructions ensure optimal performance for your Euro Pro sewing machine. Models like 372/373/374/377 and 7100/7500 have unique features, requiring tailored guidance for proper operation and maintenance.
12.1 Euro Pro 372/373/374/377 Models
The Euro Pro 372/373/374/377 models are versatile sewing machines designed for both beginners and experienced sewists. These models offer a range of stitching options, including straight stitch, zigzag, and overlock stitches. The 1-needle, 3-thread overlock feature is particularly useful for finishing seams professionally. Proper thread tension adjustment is crucial, with dials set to 4 for optimal results. Maintenance involves regular cleaning and oiling to ensure smooth operation. These models are ideal for sewing lightweight to medium-weight fabrics, making them perfect for home projects like garments, curtains, and crafts. Always refer to the specific manual for your model to maximize performance and longevity.
12.2 Euro Pro 7100 and 7500 Models
The Euro Pro 7100 and 7500 models are advanced sewing machines designed for sewists seeking enhanced functionality. These models feature a wide range of stitching options, including decorative, stretch, and heavy-duty stitches. The 7100 model is known for its durability and versatility, while the 7500 offers additional advanced features like automatic threading and a larger sewing area. Both models are ideal for handling thick fabrics and complex projects. The comprehensive manual provides detailed instructions for setup, operation, and troubleshooting, ensuring users can maximize their sewing experience. Regular maintenance, as outlined in the manual, is key to preserving performance and longevity.
Tips for Optimal Performance
Regularly clean and oil the machine, use appropriate needles for fabric types, and maintain proper thread tension to ensure smooth operation and consistent stitching quality.
13.1 Proper Fabric Handling
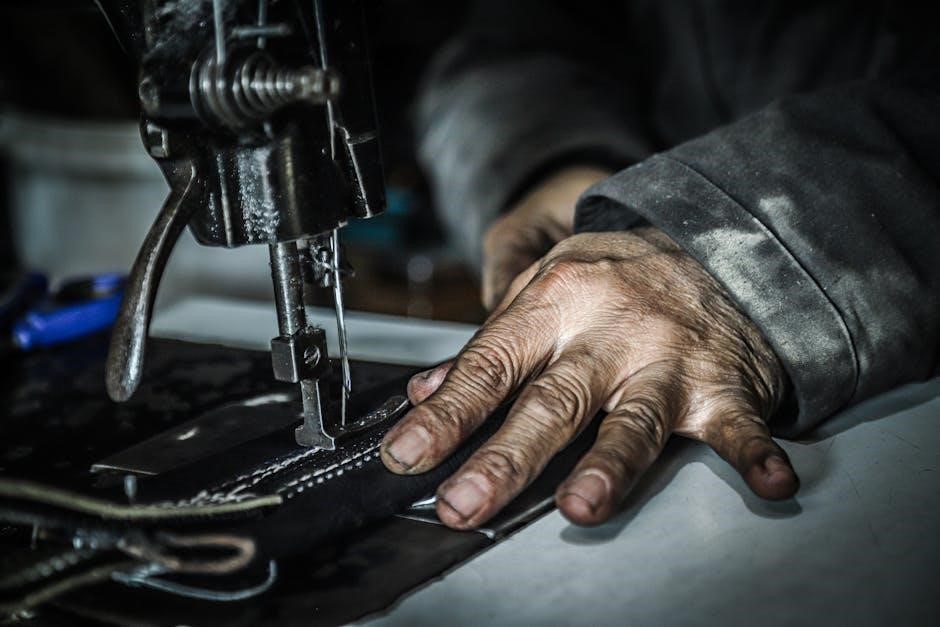
Proper fabric handling is crucial for achieving professional results. Always pre-wash and dry fabrics to remove sizing and shrinkage. Use sharp rotary cutters and mats for precise cuts. Handle delicate fabrics gently to avoid distortion. Ensure fabric lies flat during sewing to maintain even tension. For thick fabrics, use a walking foot or Teflon foot for smooth movement. Test stitch on scraps to adjust settings. Avoid pulling or stretching fabric excessively, as this can misalign seams. Use pins sparingly and remove them as you sew to prevent damage. Proper fabric handling ensures accurate stitching and a professional finish every time.
13.2 Avoiding Common Sewing Mistakes
To ensure optimal performance, avoid common mistakes such as improper threading, incorrect tension settings, and using the wrong needle type. Always follow the manual’s threading guide and adjust tension dials as recommended. Use the appropriate needle size for your fabric to prevent breakage. Avoid pulling fabric excessively, as this can lead to uneven stitching. Ensure patterns are aligned and grain lines matched to prevent distortion. Backstitch at the beginning and end of seams for durability. Regularly clean and oil the machine to maintain smooth operation. By addressing these common errors, you can achieve professional results and extend the machine’s lifespan.
14.1 Summary of Key Points
This manual provided detailed guidance on using the Euro Pro Sewing Machine, covering safety, setup, threading, and operation. It emphasized proper maintenance, troubleshooting, and accessory usage. Key points included following safety precautions, correct threading techniques, and regular machine cleaning. Understanding stitch adjustments and using the right accessories were also highlighted. The manual encouraged exploring advanced features and utilizing warranty support for any issues. By adhering to these guidelines, users can optimize their sewing experience and extend the machine’s lifespan. Refer to the PDF manual for additional details and support.
14.2 Encouragement for Further Exploration
Now that you’ve mastered the basics, we encourage you to explore the Euro Pro Sewing Machine’s advanced features and creative possibilities. Experiment with different fabrics, stitches, and accessories to expand your sewing projects. Dive into optional attachments like the knee lift or long-arm version for enhanced versatility. Share your creations and learn from sewing communities to inspire new ideas. Regularly update your skills by revisiting the manual and online resources; Embrace the machine’s full potential and enjoy the satisfaction of crafting unique, professional-quality items with ease and confidence.