
Allstar Garage Door Opener MVP Manual: A Comprehensive Guide
This comprehensive manual details the assembly, installation, and operation of the Allstar MVP and MVP-SQ residential garage door openers. It’s crucial to carefully read this guide before installation or use, ensuring safe and effective operation of your garage door system.
The Allstar MVP garage door opener represents a reliable solution for residential vehicular access. Designed for both safety and convenience, the MVP and MVP-SQ models offer smooth operation and dependable performance; This manual serves as a vital resource for installers and homeowners alike, providing step-by-step guidance from initial setup to routine maintenance.
Understanding the system’s features and adhering to the provided safety precautions are paramount. The MVP opener is engineered to enhance your home’s security and ease of use, but proper installation and operation are essential for maximizing its benefits. This guide will walk you through each stage, ensuring a successful and long-lasting installation.
Understanding the MVP and MVP-SQ Models
Both the Allstar MVP and MVP-SQ are residential vehicular garage door operators designed for sectional doors; While sharing core functionality, subtle differences cater to varying installation needs. The MVP-SQ model often features a slightly modified rail system to accommodate specific ceiling heights or garage configurations.
Both models prioritize safety with features like the photo-eye system and adjustable force settings. Understanding these nuances is crucial for a correct installation. This manual covers both models comprehensively, highlighting any specific instructions for the MVP-SQ where applicable. Referencing the model number on your unit ensures you follow the correct procedures throughout this guide.
Installation Procedures
Proper installation is vital for safe and reliable operation. These procedures cover mounting the unit, rail assembly, and door bracket connections, following all safety guidelines.
Safety Precautions Before Installation
Before commencing installation, disconnect the power supply to the garage door opener to prevent electrical shock. Ensure the garage door is balanced; an unbalanced door can cause severe injury. Never work under a door supported only by springs. Use proper safety glasses and gloves during the entire process.
Inspect all components for damage before starting. Confirm the garage door and hardware are in good working order. Read all warning labels on the opener and door components. The installer must place this manual in the provided plastic envelope and attach it permanently to the wall near the push button for future reference. Prioritize safety throughout the installation process to avoid potential hazards.
Tools Required for Installation
Successful installation of your Allstar MVP garage door opener requires several essential tools. You will need a Phillips head screwdriver, a flathead screwdriver, and adjustable wrenches of various sizes. A drill with assorted drill bits is crucial for mounting brackets and securing the rail system.
A level is necessary to ensure proper alignment of the opener unit and rail. Safety glasses are vital for eye protection, and work gloves will improve grip and prevent injuries. A ladder will be needed to reach higher mounting points. Measuring tape, a pencil, and wire strippers/crimpers are also recommended for accurate measurements and electrical connections. Having these tools prepared will streamline the installation process.
Mounting the Opener Unit
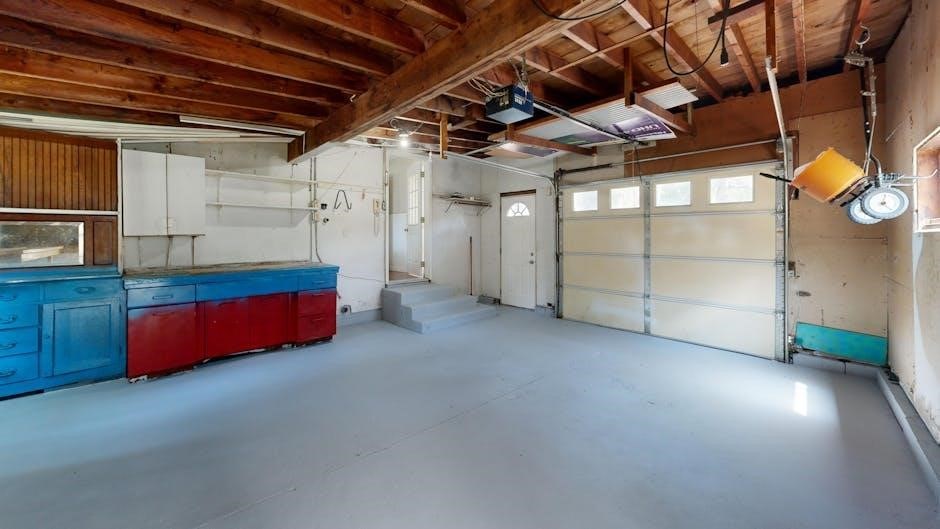
Securely mounting the Allstar MVP opener unit is paramount for safe and reliable operation. First, position the unit ensuring adequate headroom and clearance from obstructions. Utilize the provided mounting brackets, aligning them with ceiling joists or a solid mounting surface.
Pre-drill pilot holes to facilitate bracket attachment, then firmly fasten the brackets using appropriate lag screws. Carefully lift the opener unit onto the mounted brackets, ensuring it seats correctly. Secure the unit to the brackets using bolts and washers, tightening them firmly. Double-check the stability of the mounted unit before proceeding to the next installation step.
Attaching the Rail System
Proper rail system attachment is vital for smooth and efficient garage door movement. Begin by assembling the rail sections according to the manual’s diagrams, ensuring all connections are secure. Position the assembled rail towards the opener unit, aligning it with the opener’s drive system.
Attach the rail to the opener unit using the provided hardware, tightening all bolts and screws firmly; Carefully extend the rail towards the garage door, supporting it to prevent strain. Secure the rail to the header bracket above the door, ensuring proper alignment and stability. Verify the rail is level and securely fastened before continuing with the installation process.
Connecting the Door Brackets
Securely attaching the door brackets is essential for transferring the opener’s force to the garage door. Begin by identifying the appropriate bracket locations on the door itself, typically near the rollers. Attach the curved door arms to the brackets using the provided bolts, ensuring they are firmly tightened.
Next, connect the door arms to the opener’s carriage, aligning the holes and inserting the appropriate pins or bolts. Verify the door arms move freely within their range of motion, without binding or obstruction. Double-check all connections for tightness and stability before proceeding, as loose brackets can cause operational issues or safety hazards.
Operational Instructions
Proper operation involves initial setup, utilizing the push button, programming remotes, and understanding the opener’s lights for status indications.
Initial Setup and Programming
After installation, the Allstar MVP opener requires initial setup and programming for optimal performance. Begin by ensuring all wiring connections are secure and the safety sensors are properly aligned. The opener typically features a “learn” button to synchronize with remote controls. Pressing this button initiates a programming mode, allowing you to add remotes by pressing their respective buttons.
Follow the specific sequence outlined in the manual for your MVP or MVP-SQ model. Adjust the force settings carefully, ensuring the door reverses upon encountering an obstruction. Test the safety sensors by breaking the beam while the door is closing; it should immediately reverse. Proper programming guarantees safe and reliable operation, preventing potential damage or injury.
Using the Push Button Control
The Allstar MVP garage door opener is typically activated by a wall-mounted push button. A single press of this button initiates the door’s opening or closing cycle. The opener’s logic prevents operation if safety sensors are blocked or if the door is already in motion. Ensure the button is securely mounted and easily accessible, but out of reach of children.
Some models may offer adjustable features via the push button, such as a vacation lock mode to disable remote access. Refer to your specific MVP or MVP-SQ manual for details on these advanced functions. Regularly test the push button to confirm its functionality and responsiveness. A properly functioning push button provides a reliable alternative to remote control operation.
Remote Control Programming
Programming the remote control for your Allstar MVP opener usually involves a “learn” button located on the opener unit itself. Pressing this button initiates a learning mode, allowing the remote to transmit a unique signal. Within a specified timeframe (typically 30 seconds), press and hold the desired button on the remote until the opener’s lights flash, confirming successful programming.
Multiple remotes can be programmed to a single opener, following the same procedure for each device. If a remote becomes lost or needs replacement, it can be reprogrammed, erasing any previous access. Consult your MVP or MVP-SQ manual for specific button locations and programming sequences, as variations may exist between models.
Understanding the Opener’s Lights
The lights on your Allstar MVP garage door opener serve several important functions. A steady light typically indicates the opener is ready for operation. Flashing lights during programming signify successful remote control synchronization. If the light remains on continuously after operation, it may indicate a sensor issue or obstruction.
The opener’s light also functions as a safety feature, illuminating the garage area during door movement. Some models offer adjustable light settings, controlling brightness and duration. Refer to your MVP or MVP-SQ manual for specific light behavior interpretations and customization options, ensuring optimal visibility and safety within your garage space.
Troubleshooting Common Issues
This section provides solutions for typical problems, including the opener not responding, unexpected door reversals, remote malfunctions, and excessive operational noise.
Opener Not Responding
If the Allstar MVP opener fails to respond, begin by verifying the power supply. Ensure the opener is properly plugged into a functioning electrical outlet, and check the circuit breaker hasn’t tripped. Confirm the wall-mounted push button has good contact and isn’t damaged.
Next, examine the remote control batteries, replacing them if necessary. Test the remote’s functionality near the opener unit. If still unresponsive, check the antenna wire connected to the opener; ensure it’s securely attached and not damaged.
Finally, verify the photo-eye safety system isn’t obstructed or misaligned, as this can prevent operation. A thorough check of these components will often resolve the issue.
Door Reverses Unexpectedly
Unexpected door reversal during operation indicates a potential safety system activation. First, inspect the photo-eye sensors, ensuring they are clean, properly aligned, and free from obstructions. Even slight misalignment can trigger a reversal.
Next, examine the force adjustment settings. If the opener detects excessive resistance during closing, it will reverse as a safety precaution. Carefully adjust the force settings according to the manual’s instructions, avoiding overly sensitive settings.
Also, check for binding in the door’s tracks or hinges. Lubricate moving parts and ensure smooth operation. A properly balanced door is crucial for preventing unexpected reversals.
Remote Control Malfunctions
If your remote control isn’t functioning, begin by replacing the battery. A weak battery is the most common cause of remote control issues. Next, verify the remote is programmed correctly to the opener unit; refer to the “Remote Control Programming” section of this manual for detailed instructions.
Ensure there’s no interference from other radio frequencies. Devices like baby monitors or certain types of lighting can sometimes disrupt the signal. Try operating the remote closer to the opener unit to rule out range issues.
If problems persist, attempt reprogramming the remote, clearing any existing codes and starting fresh.
Noisy Operation
Excessive noise during operation often indicates a need for maintenance. First, inspect the rail system for any loose bolts or connections; tighten them as needed. Lubricate the rail, chain or belt, and rollers with a suitable garage door lubricant – avoid using grease, as it attracts dirt.
Check the door’s hinges and rollers for wear and tear; replace any damaged components. Ensure the door is properly balanced – a misbalanced door puts extra strain on the opener. Listen carefully to pinpoint the source of the noise; it could be the motor, rail, or door itself.
Regular maintenance will significantly reduce noise levels and extend the opener’s lifespan.

Safety Features and Warnings
The Allstar MVP opener incorporates crucial safety features like photo-eye sensors, force adjustment settings, and an emergency release. Always prioritize safety during installation and operation.
Photo-Eye Safety System
The Allstar MVP garage door opener utilizes a photo-eye safety system to prevent the door from closing on obstructions. These sensors, positioned near the bottom of the door tracks, create an invisible beam. If this beam is interrupted by an object – a person, pet, or vehicle – the opener will immediately stop and reverse the door’s movement.
Regularly test this system by placing an object in the beam’s path while the door is closing. Ensure the door reverses promptly. If the photo-eyes are misaligned or dirty, the system may not function correctly. Refer to the troubleshooting section for alignment and cleaning instructions. Maintaining a functional photo-eye system is paramount for safety.
Force Adjustment Settings
The Allstar MVP opener features adjustable force settings for both up and down travel. These settings determine the amount of power the opener uses to overcome the door’s weight and resistance. Incorrect force settings can compromise safety or hinder operation.

Adjusting these settings requires careful consideration. Too little force may prevent the door from fully opening or closing, while excessive force could create a safety hazard. Refer to the manual for detailed instructions on adjusting these settings, using the minimum force necessary for smooth operation. Regularly check and readjust as needed, especially after door maintenance or changes in weather conditions.
Emergency Release Mechanism
The Allstar MVP garage door opener is equipped with an emergency release mechanism, allowing manual operation of the door during power outages or malfunctions. This red-handled cord disengages the opener’s carriage from the door, enabling you to lift or lower the door by hand.
Always exercise caution when using the emergency release. Ensure the door is fully supported before disconnecting the opener, and be aware of the door’s weight. After restoring power or repairing the opener, remember to re-engage the mechanism. Familiarize yourself with its location and operation for quick access in emergency situations, prioritizing safety at all times.

Maintenance and Care
Regular inspection, lubrication, and tension adjustments are vital for optimal performance and longevity of your Allstar MVP garage door opener system.
Regular Inspection Checklist
To ensure continued safe and reliable operation, perform a routine inspection of your Allstar MVP opener at least every six months. Begin by visually checking the mounting brackets for any signs of looseness or corrosion, tightening bolts as needed. Inspect the rail system for damage, obstructions, or excessive wear.
Carefully examine the door itself, verifying smooth movement and balance. Test the photo-eye safety system by interrupting the beam while the door is closing – it should immediately reverse. Confirm the emergency release cord functions correctly. Finally, listen for any unusual noises during operation, which could indicate a developing problem. Addressing these issues promptly will prevent more significant repairs and maintain the safety of your garage door system.
Lubrication Guidelines
Proper lubrication is vital for the smooth and quiet operation of your Allstar MVP garage door opener. Apply a lithium-based grease to the rail system, focusing on the rollers and moving parts, every six months. Avoid using oil-based lubricants, as they can attract dust and grime.
The chain or belt drive also benefits from periodic lubrication; consult the manual for specific recommendations regarding the appropriate lubricant type; Never lubricate the opener’s motor itself. Regularly wipe down the rail with a clean cloth to remove any accumulated debris. Consistent lubrication minimizes friction, reduces wear and tear, and extends the lifespan of your garage door opener system, ensuring reliable performance.
Belt/Chain Tension Adjustment
Maintaining correct belt or chain tension is crucial for optimal performance and preventing premature wear. Regularly inspect the belt or chain for signs of looseness or excessive tension. If the chain is too loose, it may skip teeth, causing erratic operation. Conversely, excessive tension can strain the motor and other components.
Refer to your Allstar MVP manual for specific adjustment procedures, as they vary depending on the model. Typically, adjustments involve loosening locknuts and using turnbuckles or similar mechanisms to fine-tune the tension. Always disconnect power before making any adjustments; Proper tension ensures smooth, quiet operation and prolongs the life of your garage door opener system.
Technical Specifications
This section outlines the Allstar MVP opener’s motor details, power requirements, and maximum door weight capacity, providing essential technical information for users.
Motor Specifications
The Allstar MVP garage door opener utilizes a powerful and reliable motor designed for smooth and efficient operation. While specific horsepower details may vary based on the model (MVP or MVP-SQ), the motor is engineered to handle standard residential garage door weights effectively.
It features a robust construction ensuring durability and longevity, even with frequent use. The motor operates on standard household voltage, typically 120V AC, and is designed for quiet performance.
The motor’s internal components are thermally protected to prevent overheating and ensure safe operation. It’s built to deliver consistent torque, enabling the opener to lift and lower doors of varying sizes and weights with ease. Precise motor control contributes to accurate and reliable door positioning.
Power Requirements
The Allstar MVP garage door opener is designed to operate on standard residential electrical power. Specifically, it requires a 120V AC (Alternating Current) power supply, which is the typical voltage found in most North American homes. A dedicated 15-amp circuit is generally recommended for optimal performance and to prevent overloading.
It’s crucial to ensure the power outlet used is properly grounded for safety. The opener does not require 240V power.
The unit consumes a relatively low amount of power during normal operation, but there’s a brief surge during door movement. Always disconnect power before performing any maintenance or repairs. Verify compatibility with your home’s electrical system before installation, and consult a qualified electrician if you have any concerns.
Maximum Door Weight Capacity
The Allstar MVP garage door opener is engineered to handle a variety of garage door sizes and weights, but it’s vital to stay within the specified limits to ensure safe and reliable operation. The MVP model is generally rated to lift doors weighing up to 350 pounds.
Exceeding this weight capacity can cause damage to the opener, the door itself, or even pose a safety hazard.
For heavier doors, consider a more powerful opener model. Always accurately assess your door’s weight before installation. If unsure, consult a professional garage door technician to determine the correct weight. Proper spring balance is also crucial; an unbalanced door puts excessive strain on the opener.

Warranty Information
The Allstar MVP opener comes with a limited warranty covering defects in materials and workmanship. Review the documentation for specific coverage details and claim procedures.
Coverage Details
The Allstar MVP garage door opener warranty provides coverage for a specified period from the original purchase date. This warranty typically encompasses defects in materials and workmanship under normal residential use. Specifically, it covers the motor, gear assembly, and electronic components. However, the warranty does not extend to issues arising from improper installation, misuse, alterations, or lack of regular maintenance.
Damage caused by accidents, acts of nature, or commercial applications are also excluded. To qualify for warranty service, proof of purchase is required. The warranty is non-transferable and applies only to the original purchaser. Contact Allstar customer support for detailed warranty terms and conditions.
Claim Procedures
To initiate a warranty claim for your Allstar MVP opener, first contact Allstar customer support via phone or their official website. Be prepared to provide your original proof of purchase, the model number (MVP or MVP-SQ), and a detailed description of the issue. You may be asked to provide photographic or video evidence of the defect.
Allstar may request that a qualified technician inspect the opener to verify the claim. If the claim is approved, Allstar will, at their discretion, repair or replace the defective part or the entire unit. Shipping costs for returned or replacement parts may apply. Keep all documentation related to your claim for your records.
Limitations and Exclusions
This warranty does not cover damage resulting from improper installation, misuse, abuse, or alterations to the Allstar MVP opener. Normal wear and tear, including belt/chain wear, are also excluded. Damage caused by acts of God, such as lightning strikes or floods, voids the warranty.
Furthermore, the warranty is void if the opener is used for commercial purposes or subjected to voltages outside the specified power requirements. Any unauthorized repairs or modifications will invalidate the warranty. This warranty applies only to the original purchaser and is non-transferable. Accidental damage is not covered under this warranty agreement.